My blog has moved!

You should be automatically redirected in 6 seconds. If not, visit
http://www.midnightmaniac.com
and update your bookmarks.

envirambo

See me morph into action at the Green Phone Booth
Add to Technorati Favorites

the flock


follow me on twitter

follow me on facebook
Break the Bottled Water Habit
Eco Friendly, Environment & Green Blogs - BlogCatalog Blog Directory

Friday, January 30, 2009

No use crying over spilled buttermilk.


I hope I mentioned keeping your mixer covered during my bread & butter post. This is why! This is also why you do not leave your mixer unattended while replying to comments on your posts. The irony of it all is that I was replying to a making your own butter question.

Oh, it's sooo easy. You just pour the cream in and let the mixer do all the work. You can walk away and .....shit, Shit, SHIT!


Share/Save/Bookmark

Thursday, January 29, 2009

Thrifty Green Thursday - Unnecessary Necessities


Can you tell me what is missing from this picture?


Birthday candles? No.
Sprinkles? Well, yes, but that is not it.

The paper baking cup!

I cannot recall the last time I saw a cupcake outside of my home that was not contained in a paper baking cup. Dare I say, never? Why is it acceptable for muffins to be naked, yet cupcakes must be clothed in pleated pastel paper skirts? Cupcakes even have designer clothes now. Oh sure, you can get liners to match your mood, kitchen, sports team, favorite cartoon character, whatever your little heart desires. They even come with feet!


At least those are reusable, although I am leery of putting silicone in my oven. What I am getting at is, is all that really necessary? Do cupcakes really need their own individual wrapper? What are we protecting them from, ourselves? Why would you want to add a barrier between yourself and that little nugget of goodness? I can hardly wait to get them out of the pan before devouring! Or, is it that we have become so lazy that we cannot spare the finger pressure to spray the pan to keep them from sticking?

Sometimes I have to stop and wonder, "Why am I doing this?" Just because you have always done it that way or because everybody else does it that way, does not mean you must continue to do it that way. And so it goes with the cupcakes. One day I decided to stop wasting my money on little paper cups that will be used once and thrown away; decided to stop buying paper cups always packaged in plastic; decided to stop adding to the already overburdened waste stream. And you know what? No one even noticed. Makes me think they were never necessary to begin with.

It is tiny choices like this, when added to all the other little things you do to be green, multiplied by all the people in the world trying to live sustainably that equals big change. Do not think for a minute that the minutest thing you do does not make a difference. It does! Solar panels and geothermal heat are wonderful, but the little things count too.

Share/Save/Bookmark

Wednesday, January 28, 2009

Raising Poultry Successfully - Chapter 2


Chapter 2
WHAT KIND OF CHICKENS SHOULD YOU RAISE?

Once you have decided that you want to raise chickens, and determined that you have the space, a building of some sort, and that the law allows it, the next thing to decide is whether you want eggs, meat or a combination of both. do you want to spend 8 weeks or 17 months on the venture? In the case of eggs, do you want white ones or brown ones?

Decisions, decisions, decisions! But, they are fun decisions. What kind of chickens to raise? How long does it take? How much will it cost? What can you expect in the way of production?

TYPES OF CHICKENS
Up until about 1930, chickens were kept mostly for their eggs. Almost every farm had a small flock of medium-size, dual-purpose chickens. These chickens were fed on dinner table scraps, plus whatever grain the farmer's wife could scrounge from the oat bin or corn crib. Nothing very scientific about that. After a couple of years, when the hens didn't lay enough eggs to pay for their keep, they were thrown into the pot for soup or stew. When the roosters, having been fed on a catch-as-can basis, finally reached a reasonable weight, they provided the customary Sunday dinner.

Early in the 1930s, several major changes took place in the production of chickens for both eggs and meat. The practice of keeping the old-fashioned, medium-weight, dual-purpose chickens began to decrease. Poultry farmers began to specialize in raising birds for either eggs or meat.

If, up until the 1930s, cooking the meat of chickens was usually only an offshoot of keeping a flock for eggs, by the early 1930s, things had changed. Boy, how they changed! The broiler industry was booming. Heavy varieties of chickens were being used, mostly hybrid crosses of the Cornish and White Plymouth Rock breeds, to produce fast-growing birds with broad breasts, big legs and thighs, and rich yellow skin.

In 1934, about 30 million broilers were produced in the United States. In 1983, over 2 billion broilers were raised. In the 1930s, it took about 5 pounds of feed to put 1 pound of gain on a broiler chicken over a period of 4 months. In 1952, the amount of feed required to raise a broiler to about 4 pounds had been reduced to 3 1/2 pounds, over a period of 12 weeks. Now, in the 1980s, it only takes 2 pounds of feed to produce 1 pound of weight gain on a broiler chicken.

Similar specialization has taken place in the production of light-weight egg-producing chickens, with all the brooding and mothering instincts bred out of the hens. As a small flock owner, you too can specialize in meat or eggs. Or you can raise the old-fashioned, dual-purpose chickens from which you can get both eggs and meat. There are differences in terms of time and work involved. Let's take a look at what the differences are.

MEAT CHICKENS
Meat birds come in a few different categories. When ready for eating, a broiler-fryer is a bird less than 3 months old, male or female, with a pliable, smooth-textured skin and tender meat. The breastbone cartilage is quite flexible, in contrast to a 1-year old bird whose breastbone tip is hard and inflexible.

It used to be that broilers and fryers were prepared differently for the retail trade, thus the different terms. Broilers were sold whole or cut in half. Fryers were quartered so that there were 2 pieces combining breast and wing, and 2 pieces combining drumstick and thigh. Today, however, you will find whole birds labeled as fryers at your supermarket. It is a matter of semantics; the words broilers and fryers are used fairly interchangeably.

Although theses meat birds reach good slaughter weights quickly, mature hens lay few eggs, and feeding a heavy hen for her sparse output of eggs can drive you to the poorhouse. A broiler-fryer chick can reach 4 pounds, live weight, in 8 weeks and yield about 3 pounds of edible meat, with some bone included.

A roaster is a larger chicken, of either sex, which is usually slaughtered at 5 months or less, weighing 5 to 8 pounds. They have tender meat and flexible breastbone cartilage. Capons are castrated male chickens, raised to a larger size than broiler-fryers and used for roasting.

I recommend that beginners concentrate on raising broiler-fryers for meat birds.

EGG LAYERS
The strictly egg laying type of chicken starts producing eggs about 5 months from the day she is born. In her first laying cycle, which can last 12 to 14 months, she can produce 20 to 22 dozen eggs. Although she can lay almost 10 times her own weight within a year, this hen is small, skinny, and nervous, and won't provide much meat for a Sunday dinner when she has outlived her productiveness.

DUAL-PURPOSE CHICKENS
Dual purpose chickens, larger than strictly egg-laying types, are good for both eggs and meat, but they take a little longer to mature. The hens start laying at 5 1/2 to 6 months. With some notable exceptions, they generally lay fewer eggs than the strictly egg-laying types - perhaps 18 to 20 dozen during a laying cycle. They also cost more to keep because they eat more feed; but the hens can provide a tasty dinner after their egg-laying cycle is over. With some exceptions, the cockerels (males) take longer to reach good broiler-fryer weight. However, they can be carried on to a good roaster weight of 5 to 8 pounds.

The hens take longer to reach the egg-laying stage than egg-layers, and their egg production is usually less. The cockerels, with the exception of certain strains, take longer to reach optimum broiler weight then most meat breeds, although they can be carried on to reach good roaster weight of 5 pounds or more. Both the hens and cockerels provide tenderer meat than the lightweight, strictly egg-laying types of chickens.

FURTHER COMPARISON OF CHICKENS
It doesn't take long to raise broilers and fryers. Raising chickens for egg production takes a lto longer and is more involved.

Although the care and feeding of any baby chick is about the same for the first 6 weeks, after that point, meat birds and potential egg layers go separate ways. The meat chick is kept on a high-protein feed ration. The egg chick is fed a ration lower in protein because too much protein at that stage of her life can cause a female to come into egg production too soon, resulting in fewer and smaller eggs and possible damage to her internal organs.

Thus, it is not advisable to keep broiler-fryers and egg layers in the same pen, certainly not past 6 weeks. Also, egg layers enjoy roosts and must have nests to lay their eggs in, pieces of furniture totally unnecessary for the meat birds.

With regard to time involved, most people spend more time attending to household (nonproducing) pets, such as cats and dogs, than is required in caring for a little flock of chickens.
Share/Save/Bookmark

Tuesday, January 27, 2009

Safety First


Back in October, I made the leap from disposable razors to shaving with a safety razor and have never looked back. I absolutely love it! I am in my fourth month and have only changed the blade once. My original estimate was one blade per month, with a savings of $236 - $336 and not having to buy blades again for eight years! At this rate I can double that!


So far I have only nicked myself a total of maybe three times. I would have done so with a regular razor also. Ankles and knees sometimes get the best of me when shaving half asleep. It takes no more time than it did when shaving with a disposable. I have nothing but praise for the safety razor. I like it so much that I gave one to the chitlin girl for Christmas.

She left the next day to spend the rest of Christmas break with her mother. I had not thought about it since. The other day I remembered that I never showed her how to use it.

So I asked, "Did you figure out how to use the safety razor?"

She replied, "Yes, it took me a little while to figure out how to open it, but I got it."

"So how is it going?" I pressed on.

She looked at me quizzically, "What do you mean?"

"Well, have you cut yourself yet?" Bracing myself for the answer.

"Why would I cut myself?"

So, there you have it folks. The safety razor: So easy a 12 year old can do it!

Share/Save/Bookmark

Monday, January 26, 2009

Would you like a slice of humble pie with that?


Hubby learns what it is like to see the world through green-colored glasses in my Monday post over at the Green Phone Booth.

Share/Save/Bookmark

Thursday, January 22, 2009

Thrifty Green Thursday - Throwing in the towel.


Household paper goods are so ubiquitous we do not even think about them anymore, but there was a time when towels and napkins were made of soft, reusable cloth. Nowadays the equivalent of about 270,000 trees are used and discarded each day worldwide. the average North American churns through 50 pounds of paper products a year, including napkins, paper towels, tissues, and toilet paper. While some of these goods are made from sustainable tree farms, native forests are still a primary source. This leads to erosion and loss of animal habitats. Plus, papermaking is a toxic process that is hard on the environment. Many paper products are whitened with chlorine-based chemicals - which are not as harmful as chlorine bleach, but still release carcinogens and toxins into the water. Others are scented, dyed, or treated with "lotion" made of petroleum, silicone, and chemical surfactants.


Thinner paper is more environmentally friendly than thick or quilted varieties. Use paper towels sparingly and reuse them when practical; some brands can be rinsed numerous times. Buy only plain, unscented, white, lotion-free toilet paper and tissues, which are better for the environment.

Help reduce chlorine-related dioxins in the air and water by purchasing paper products that have been whitened with hydrogen peroxide, oxygen, or ozone bleach. "Totally chlorine free" (TCF) is best, "processed chlorine free" (PCF) is at least made without the most harmful type of chlorine, and "elemental chlorine free" (ECF) is the least desirable, but better than conventional paper goods. Unbleached paper products are the best choice.

Look for products made of recycled paper. Among the recycled papers, a high postconsumer waste (PCW) content is best, because it keeps paper out of landfills and reduces the need to use virgin wood fiber. Recycled papers usually list the amount of PCW on their packaging; look for varieties with the highest PCW percentage you can find.


Use cloth napkins and wash them when they are soiled; they are more absorbent than some of the "eco" paper brands. Substitute sponges, dishcloths, or kitchen towels for paper towels. A good way to start is to throw a dish towel over your paper-towel rack, as a reminder to dry your clean hands, countertops, and dishes with a reusable cloth towel instead of a disposable paper one.

Our everyday napkins.

Over a year ago I purchased two packs of dish cloths. We have been using them as our everyday napkins ever since. They have survived spaghetti sauce, BBQ sauce, ketchup, mustard, butter, chocolate milk, many spills, and many messy eaters.

Hand drying towels.

How many paper towels does it take to dry your hands? One, two? One never seems like quite enough, but one cloth towel is all it takes to get the job done. Our hand drying towels consist mostly of the flour sack variety. They are thin and therefore dry fast. I like to throw one over my shoulder while working in the kitchen for quick access. Otherwise, one is always hanging on the oven door pull - which acts as a dryer while baking.

Cleaning towels.

I prefer cloth versus paper when cleaning up spills - no matter how messy and disgusting they are. With cloth one is enough to clean my entire kitchen, it holds up to scrubbing, rinsing is not a problem, it is far more economical, does not come packaged in plastic, and I never run out. These "bar towels" are just the right size for wiping down counters, scrubbing the stove top, cleaning the refrigerator, and catching spills.

By investing just a few bucks I have drastically reduced our waste, my trips to the store, dioxins in our air and water, trees being cut for virgin wood fibers, and plastic packaging; all while getting a far better return on my investment than the one time use and disposal of paper towels.


Share/Save/Bookmark


Wednesday, January 21, 2009

Raising Poultry Successfully

Photo from Doolittle Farm Yarn.

Lately I have chickens on the brain. I think they are funny to watch, provide good bug control in the summer, and nothing compares to farm fresh eggs. I had a small flock six or so years ago, but it was the wrong time in my life to do so. I am no longer working three jobs, live just outside of town on half an acre, and am very committed to living a more eco-friendly, simple, sustainable life. Chickens come to mind. Well, chickens and a goat, but I am having a hard time convincing Hubby on that one. Just think of all the gas and time we would save by not having to mow the lawn. Pleeeeaaaase???

Pretty please?

Anyway, I am giving serious thought to having backyard chickens again and am reading the book Raising Poultry Successfully. Since this seems to be an area of considerable interest in the green blogosphere I thought I would share my book with all of you. The book covers chickens, ducks, and geese, but for now I am going to focus on the chicken chapters.


Chapter 1
WHY RAISE CHICKENS?

Some people raise rare and fancy chickens as a hobby, sometimes for shows. Others raise certain breeds for their hackle feathers (neck feathers), which they use to make fishing lures.


However, the best reason that I can think of for raising chickens are to provide fresh eggs and delicious meat for you and your family.


Have you ever tasted a really fresh egg? Sometimes, when people experience a happy occasion, they exclaim, "My cup runneth over!" But, when you crack an egg into the frying pan, you do not want it to runneth over. That's an unhappy occasion. A fresh egg does not runneth over the pan. The higher the yolk stands and the more compactly the white stays together, the fresher the egg.


If you have never eaten a fresh egg, that is, an egg served on your plate on the same day it was laid, you are in for a special treat. Once you have tasted a really fresh egg, you can never go back to the supermarket variety, which may have been packaged 30 days before you brought it home.


Not only can chicken be prepared in 101 different ways, but health practitioners are recommending that we eat more chicken and less red meat. The meat from chickens has less fat and fewer calories, and contains more protein of higher quality, than comparable amounts of beef or other red meats.


You don't need a lot of land or space in order to raise chickens. Whether you have several acres or just a big backyard, if you have some kind of outbuilding - a shed, garage, or small barn - and if your local zoning laws don't prohibit it, and if the neighbors don't protest, you can raise chickens to have fresh eggs and tasty meat for your table for a small outlay of cash and a little effort and time.


The care and feeding of chickens is a responsibility. Before deciding to raise chickens, consider the fact that it is a 7 day a week job. As a beginner, you will probably start out with a small flock of chickens, and their care and feeding will take only about 15 minutes of your time, twice a day, every day. This means you can't go away for the weekend and leave them to fend for themselves. Also, in the interest of economy, the killing and dressing-out of meat birds should be done by you or members of your family. If you doubt that you are capable of killing and cleaning the birds, then the raising of meat birds (broiler-fryers) is probably not for you. You could still raise laying chickens for their eggs alone.


Chickens are colorful; their behavior is interesting and amusing. Give your children a chance to help with the daily chores. It will help them develop a sense of responsibility and will give them a hand in useful, productive work. Chickens can make reasonably good pets, although they cannot be housebroken. They will come when called, fly up onto your shoulder, and eat out of your hand. But, and this is very important, do not make a pet of any bird or animal you will ultimately slaughter and eat. Just the thought of eating a pet is repugnant to most people. Treat the birds with kindness and consideration, but don't make pets of them if they are destined to wind up in the freezer.


Speaking of freezers, you will need one with the capacity to hold about 75 pounds of meat, if you begin a broiler raising venture with 25 baby chicks, as I suggest in chapter 3.


A very good reason for raising meat birds is that it can be a short-term project. You can fill that aforementioned freezer with broiler-fryers in just 8 weeks, whereas it takes about 5 months to raise a pig or lamb to good slaughter weight, and up to 1 year to raise a beef calf. And, of course, those animals cost more to start with. You aren't liable to lose your shirt with a small flock of chickens.


However, the idea that you can save money by raising chickens in not a good reason to do it. All things considered, including maintenance of the chicken house, cost of the chicks, the feed, necessary equipment, electricity, and your time and labor, you cannot save money by raising your own flock. You probably can buy eggs and packaged broilers at a supermarket (albeit not as fresh and delicious) cheaper than you can raise them. this is especially true for a small flock. Larger flocks may be more economical.


Economics aside, the main reason for raising you own chickens are quality and satisfaction. Your own eggs will be fresher, and the meat will taste better. Due to a lot of static, mostly from small flock owners, there are fewer drugs in commercial chicken feed than in previous years. This means even higher quality fresh meat - even if you don't grow your own feed.


And, there is a certain satisfaction in gathering your own eggs and barbecuing your own fryers that cannot be gained in any other way. You fed, watered, cared for, and raised these birds. Now you can enjoy the fruits of your labor. You can't buy that kind of satisfaction at the market.

Share/Save/Bookmark

Tuesday, January 20, 2009

Monday, January 19, 2009

A good mind is a terrible thing to waste.


As I walk into the grocery store I cannot help but notice all the carts coming out overflowing with paper and plastic bags. My mind recalls the day when I opened the closet door and was engulfed in an avalanche of plastic shopping bags. I drop my reusable bags in a cart and quickly breeze by the aroma-less bread in its plastic prison. My mind drifts to the heavenly scent wafting from my kitchen as a fresh baked loaf is pulled from the oven. I arrive a my first stop, organic produce. Ugh, more plastic. Why must vegetables be suffocated by plastic? I want to smell them. My mind makes short work of compiling a seed list and adds food preservation to my 2009 to do list. While I load up my string bag, the lady next to me rips off one of those flimsy plastic produce bags and puts in an onion. One onion. Rips off another bag and puts in a red pepper. One pepper. When she reaches for the third bag I bite my tongue and make a graceful exit. My mind adds plastic produce bags to my pet peeve list and files it away in future blog posts.

I enter the meat department and search for some grass fed beef. My mind instantly conjures up an image I saw recently of a herd of cows all pooping. Pooping at the same time. Nothing but butts, pooping. It was like a methane fountain of poo. Gross! I look at my list, thankfully I do not need much since we are having meatless meals twice this week. I pick up a pound wrapped in plastic on a styrofoam tray. My mind thinks back to Beth's post about when presenting her butcher with a reusable container, a journalist asked, "Do you ever get embarrassed?". At that moment I realize I am embarrassed for buying the plastic wrapped beef on a sytrofoam tray and decide to start bringing my own container to buy from the meat counter.

Making my way around the perimeter of the store I move on to the dairy section. Pathetically excited to skip the five dollar pound of organic butter, I reach for the glass bottle of cream and look forward to making butter with my daughter. I start to drool as my mind relives the fresh buttermilk pancakes we enjoyed for breakfast. Also on my list is yogurt and sour cream. Sighing, I add them to the cart. My mind adds them to the tally of the non-recyclable tower in my basement awaiting some future use. Learning to make my own also goes on my 2009 to do list. A man reaches over me for a styrofoam carton of conventional eggs. My mind replays the scene from The Meatrix where chickens are being de-beaked so they don't peck each other to death living in such close quarters. I pop open a carton to ensure the beautiful brown, free range, organic miracle nuggets inside are all intact before placing them in my cart. My mind goes back to the tower in my basement. Next to it is a stack of cardboard egg cartons happily awaiting Spring, when they will be filled with seedlings to be transplanted into my square foot garden. Milk is the last dairy item on my list. I grab three gallons of rBGH free milk and make room for them in my cart. Thankful my state still allows rBGH free labeling, my mind wonders what I will do if the labeling becomes outlawed? rBGH free milk already costs more, but organic milk costs twice as much. I cannot afford organic. My mind goes back to a time I believed this. Yet, a family of four living on one income we eat nearly all organic. My mind thinks of the all the receipts I have kept for the past three years with the intent of developing a budget. I decide to add up all those receipts to see just what we were spending eating conventional compared to organic. Perhaps I can afford organic.

In the bulk goods section I have a lengthy list: flour, sugar, salt, pepper, oats, baking powder, cornstarch, dill, rosemary, peanut butter, honey, rice, my favorite chocolate covered raisins (damn no grazing sign!), and Dr. Bronner's. One by one I fill my containers from home and check an item off my list. Reused spaghetti sauce jars, a yogurt container from the tower in my basement, a drawstring bag made from an old camisole, whatever; all with their tare weight recorded in permanent marker on the bottom. I fill the container, insert the appropriate PLU twist tie from a previous shopping trip, and place the item in my cart. Happy to be making use of the stockpile I could not bear to send to the landfill; someone next to me grabs a plastic bag off the shelf, fills it pasta, grabs a twist tie, records the PLU on it and goes about their way. My mind wonders why bother shopping in bulk to avoid the packaging if you are just going to create unnecessary packaging by taking it home in a plastic bag? #3 on my pet peeve list, bulk goods plastic bags.

My last stop on this grocery trip is the checkout. I file in line like cattle being herded for slaughter. Waiting my turn I read the tabloid headlines, fight the urge to buy that magazine with all the wonderful recipes in it, compare contents of shopping carts, blush when someone oddly examines mine, and pretend to look at my list whilst avoiding the judgmental gazes. My mind delivers a pang of guilt as I recall I used to be on the sending end of those judgmental gazes. "Hippy." "Freak." All to quick to stereotype. How wrong I was.

The cashier greets me with the ubiquitous, "Did you find everything you were looking for?". Hmm... I will not go there. She rings everything through and gives me my total, nearly the same as always, no matter what I buy. I hand over my reusable bags and the bagger obligingly fills them. While fishing for my keys I do not notice he slips my grass fed beef into a plastic bag before placing it into my cloth bag. Oh bother. Pet peeve #4. My mind asks, "Why do I even try?".


This is my submission for the January APLS Carnival on "mind games". Read all submissions January 22 at VWXYNot?


Share/Save/Bookmark

Friday, January 16, 2009

Corn to feed your car?


I am calling on your superhero powers to please take action on this matter! Go to the Green Phone Booth, click the link at the bottom of this post, fill in your name and email address, and urge the USDA to rethink its "Food for Fuel" Policy.


USDA is poised to deregulate the world's first genetically engineered (GE) industrial crop. Similar to GE pharma crops that use corn for producing drugs, Syngenta's "Event 3272" is genetically engineered to use corn for energy (ethanol) production and not for food. This unprecedented, industrial application of a GE technology poses a variety of environmental, health, and economic risks that must be carefully evaluated to determine whether the widespread use of this GE industrial corn crop should be allowed on farms across our nation.

Share/Save/Bookmark

Tuesday, January 13, 2009

MYO Basic White Sauce

Keeping with the theme of Make Your Own, Béchamel, a basic white sauce is something every home cook should have in their culinary back pocket. I have been known to whip it out on unprepared nights when the family is staring at me asking, "What's for dinner?". Pasta, tuna, and veggies in a creamy white sauce - no problem. Homemade mac and cheese - coming right up. Fettuccine Alfredo - simple, set the table.

BASIC WHITE SAUCE

Melt 2 tablespoons butter in a saucepan over medium heat. Add 1/4 cup all-purpose flour and stir 1 minute to cook out raw flour taste. Gradually whisk in 1 cup milk, whisking constantly to prevent lumps. Add 1 teaspoon salt, 1/8 teaspoon ground black pepper, and 1/8 teaspoon grated nutmeg (optional). Add another 1 cup milk and whisk constantly until thick and simmering. Cook until very thick and smooth, 2 to 3 minutes. Makes about 2 cups.


Serve as is with pasta, veggies or whatever you choose; or, use it as a base for other dishes. Add some paprika, cayenne pepper, and a few red pepper flakes to use it a a spicy sauce for sausage and gravy over biscuits.

ALFREDO SAUCE

Throw in
2 tablespoons cream cheese, 1 clove of minced garlic, 1 cup of grated Parmesan. Top with parsley flakes and you have a quick and easy Alfredo sauce. The Chitlins are Alfredo fiends! I have made several versions and I like this one the best because it does not separate when leftovers are stored in the refrigerator. We used to spend over $3.00 on a jar of processed Alfredo sauce. This is so easy to make and tastes waaay better.


CHEDDAR CHEESE SAUCE

After the basic white sauce has cooked and thickened, stir in
1 1/2 cups (6 ounces) shredded sharp or extra-sharp Cheddar cheese, 1 teaspoon paprika, 1 teaspoon Dijon mustard (optional), and 1/8 teaspoon ground red pepper. Makes about 3 1/2 cups. Stir in cooked elbow noodles or shells for homemade mac and cheese. You can leave the mustard out, but it really does taste better with it. I do not even like mustard, but always include it. The Chitlins have never complained about it either. If you want a golden crust, top your mac and cheese with buttered bread crumbs and broil until desired color.


Once you get the basic recipe down, add ingredients to vary dishes to your heart's content. Use what you have on hand. The ingredients needed are almost always already in your kitchen. Save a trip to the grocery store and skip the extra packaging of over-priced processed "food". Béchamel is cheap and easy, the leftovers store well, and you will never have to panic again when someone utters the dreaded, "What's for dinner?".

Share/Save/Bookmark

Monday, January 12, 2009

Make Your Own

With the economy in a slump and the future of the environment in question a lot more people are looking for ways to consume less and make do with what they already have. From learning to sew, make repairs, grow a garden, and cook from scratch there is a whole lot of DIY going on. Lately I have noticed a new buzz in the blogosphere - MYO. Make Your Own certainly is not a new concept; for generations before us it was a way of life, there just is a lot of talk about it as of late.

In the past week alone a slew of posts have popped up.

Make Your Own:
mayonnaise
liqueur
apple sauce
apple cider vinegar
tortillas & enchilada sauce
marshmallows
vanilla ice cream
deodorant
sunscreen
foot scrub

Heck, I have even posted about MYO bread & butter, automatic dishwasher detergent, and menstrual pads. I do not know if it is the winter weather or some new found feeling of empowerment, but lately I look at something and think, "Why buy it? I can make that!". Becoming disgusted with plastic and over packaging has also been a motivational push in making my own.

Here are three things we use a lot of that are super simple to Make Your Own.

KETCHUP

1 (6-ounce) jar tomato paste
1/2 cup carrot puree
1/4 cup water
2 tablespoons apple-cider vinegar
2 cloves garlic, minced
1 tablespoon firmly packed brown sugar (optional)
1/2 teaspoon dry mustard
1/4 teaspoon salt
1/4 teaspoon ground allspice
1/4 teaspoon chili powder, or to taste

1. Stir all ingredients together in a big sauce pan and bring to a boil over medium-high heat. Reduce the heat and simmer until the mixture has reduced by about half, 15 to 20 minutes. Let it cool before serving.
2. Refrigerate in an airtight container for up to 5 days, or freeze in 1/4-cup amounts for up to 3 months.

I find a muffin tin works great for freezing the 1/4 portions. Once frozen, remove from muffin pan and place in container of your choice. When needed, pull out the desired portions, thaw, and serve! The next recipe utilizes your frozen ketchup portions.

BBQ Sauce

1/4 cup ketchup
2 tablespoons brown sugar
1 tablespoon apple cider vinegar
1 tablespoon Worcestershire sauce
1 tablespoon Chipotle Chile powder

Combine all ingredients in a glass microwave safe bowl, stirring well.
Microwave at high one minute or until thoroughly heated. Enjoy!


Since this uses your homemade ketchup it will only keep refrigerated for the same amount of time. I only make it as needed so there is never any to store; however, you could make a larger batch and freeze just like the ketchup.

This last one I usually ask the Chitlins to make - it is that easy.

TACO SEASONING

1 tablespoon chili powder
1/4 teaspoon garlic powder
1/4 teaspoon onion powder
1/4 teaspoon crushed red pepper flakes
1/4 teaspoon dried oregano
1/2 teaspoon paprika
1 teaspoon ground cumin
1 teaspoon sea salt
1 teaspoon black pepper

Put all ingredients in small jar, shake to mix.
Use 2 tablespoons to season meat.


I cannot believe I used to spend a buck on those little packets full of sodium! All the ingredients needed were wasting away in my spice cabinet. Never again. Follow amounts listed to use as needed; or, quadruple to have extra on hand. On a side note, I have found that taco meat makes super awesome chili.

Now that I have a few simple MYO recipes under my belt I would like to expand my repertoire. For 2009 my goals are:

yogurt
sour cream
mozzarella
ice cream
chocolate syrup
granola
stock/broth
cream of chicken/mushroom
pasta sauce
pasta
deodorant
laundry soap
compost/fertilizer

If you have any tried and true recipes for the list above, please post it in the comments or leave a link to your blog where you have posted about it. Other MYO suggestions/recipes are also welcome.

Share/Save/Bookmark

Thursday, January 8, 2009

Thrifty Green Thursday - Bread & Butter


Santa did not bring me worms for Christmas like I had hoped, but he did bring me a gift that keeps on giving. Keeps on giving him bread. I got a shiny new bread machine.


I just started baking my own bread a few months ago with lackluster results. I had grand aspirations of eliminating plastic bread bags, saving money, and impressing my family with my domestic skill while making the house smell great. Instead I got oddly shaped-hard-dense loaves, entire days lost to "bread making", bread shortages, and emergency runs to the store to buy bread.


So when I unwrapped my new toy on Christmas day I thought my prayers had been answered. Yes! Now we can enjoy some real bread. I am still not sure if the gift was for me or hubby. Either way it does not vouch well for my bread baking artistry. I had such high hopes for this machine. You put the ingredients in and take the bread out. Perfect! Nothing for me to mess up.


Then explain this. Is it a chef's hat? A giant popover? What? It certainly cannot be a loaf of bread from my new magic machine. Can it? Damn. I have made three different loaves and none were good. I had better luck the old fashioned way. What am I doing wrong? Is there some secret bread baking society that I am banned from, a gluten gene I lack, or am I just doomed to forever eat mass produced bread out of a plastic bag? The only somewhat success that has come out of this is a batch of cinnamon rolls and butter.


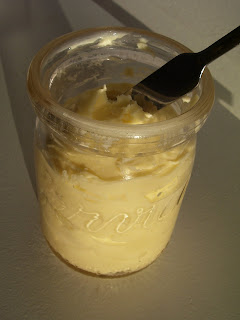
Yes, butter. Since I was having no luck on the bread front I thought I would try to at least make its topping good. Homemade butter, which I never thought to be something I was capable of, is surprisingly easy to make. All you need is cream and a means to agitate it. A stand mixer works great.


Fifteen minutes later whipping at medium-high to high speed and it transforms from cream to butter.


Pour the butter and liquid off through a sieve, but save the liquid!! Not only did I make butter, but buttermilk as well. It is a two for one deal. The buttermilk will be used for pancakes or biscuits later.


Rinse the butter under cold water until it runs clear. Press out excess moisture and transfer to container of your choice.


One pint of cream will yield one cup of buttermilk and about one cup of butter (2 sticks). I used some cheap cream I had left over from Christmas to make this batch, but the least expensive organic cream I can find sells for $2.95 a pint. The organic butter I buy is $4.99 a pound. Organic buttermilk is $3.39 a quart. I save over $2.00 on the butter by making my own, but actually end up spending more on the buttermilk. In the end I gain a financial savings of 79 cents. Not worth the time to make your own? Consider this, in an effort to reduce packaging I started buying premium organic grass-fed local butter packaged in one paper wrapper. It retails for $6.99 a pound. Ouch! Now my savings jump to $2.79.

The real benefit for me is the package savings. I can go from two cardboard packages and four wax paper wrappers when buying the less expensive option; or, one cardboard package and one paper wrapper with the pricey stuff, down to one cardboard container when making my own. I think I can even find cream in glass at my coop. Even less waste!

I find it amusingly enjoyable and oddly empowering to make my own butter and buttermilk. Now if I could just get that bread thing figured out...

Share/Save/Bookmark